After a long, cold winter, it’s so exciting to see the trees and grass starting to turn green. It’s finally time to think about opening your in-ground pool!
Opening an in-ground pool is a multi-step process. Keep in mind that Zagers’ professionally trained staff is always ready to assist you. We can answer questions, provide you with more information, or simply take care of your pool opening for you. Time slots for our pool opening services fill quickly so, if you’re interested, be sure to submit a request to schedule an appointment soon.
If you’re more of a DIY kind of person and prefer to open your in-ground pool yourself, carefully follow these steps. And please be sure to call us if you have any questions!
1. Get Your Supplies In Order
There are lots of things you’ll need to get your pool up and running for the season. Make the entire process easier by making sure you gather everything you need before you get started.
- BioGuard Deluxe Pool Opening Kit (Spot Kill, Back Up 2, Stow Away, Pool Opening Complete)
- O-ring Lube
- Filtering Component (depending on type)
- D.E. Powder
- Cartridge
- Sand (you likely already have sand in your filter, just remember to change it every 2-3 years for best results)
- Equipment Drain plugs, Skimmer Basket and Return Valve Fittings
- Any additional items you may have stored for the winter (ladder, railings, slide, diving board, etc)
2. Clean, Remove and Store Your Pool Cover
Winter can take a toll on pool covers. From standing water to branches and leaves, your cover is probably less than clean. Start by removing most of the debris (a large, soft broom or pool brush should do the trick) and as much water as possible, using a pool cover pump. You’re now ready to remove the cover. It’s a two-person job, so be sure you have help from a friend or spouse! Lay the cover flat and clean off any remaining debris with Stow Away and a hose (or pressure washer to speed up the process). Let it dry completely before properly folding and storing it for the season. It should be folded like an accordion or fan—if you’re unsure of how to do this, please contact Zagers for more information.
3. Fill ‘Er Up
Add enough water to bring your level approximately halfway up your skimmer.
4. Install Equipment Plugs, Remove Pool Plugs, and Reconnect Valve Fittings
First, reinstall plugs in your pump and filter. Next remove pool plugs and skimmer gizmo that were installed when your pool was winterized. You will also need to reconnect return valve fittings if you removed them last winter. If you have underwater lights, now’s the time to install them and make sure they’re working.
Pro tip: Be sure to install plugs in your filter and pump before removing plugs from the pool in case your equipment is lower than the pool. This will prevent water from rushing out of the pool through the open valves of the equipment.
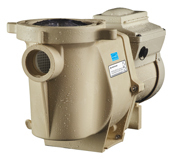
5. Prime Pump and Turn On Your Equipment
Be sure the filter valve is in the correct operating position and lube all o-rings on the equipment before turning on power. Now it’s time to prime the pump with water from a hose or bucket. Turn on the power immediately after priming. Check for leaks, drips, and proper flow. Again, if you’re not sure what to look for, give Zagers a call and we can help.
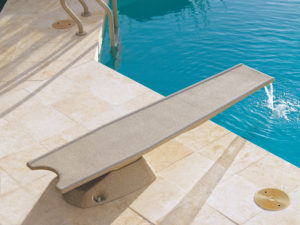
6. Add Ladders, Diving boards, etc.
Any pool equipment like ladders, rails, diving boards, and slides can be re-attached now. Lubricate all of the bolts now to prevent rust from tightening them over the summer months.

7. Add Opening Chemicals
While your equipment is running add in your pool opening chemicals (Spot Kill, Back-Up 2, and Pool Opening Complete). Give your filtration system 24-48 hours to eliminate any debris and bacteria and allow the chemicals to work before moving to Step #7.
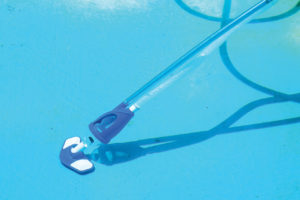
8. Get Out the Vacuum
Brush and vacuum your pool to get rid of any additional debris that’s settled and heads off algae problems later in the season. Pool water is one place you don’t want to see green!

9. Have Water Tested
It is now time to test water for Alkalinity, pH, calcium hardness, and chlorine levels. You can test it yourself or bring a sample to Zagers and we’ll test it for you. Based on the results, you can begin to balance your in-ground pool water with the appropriate mix of chemicals.
10. Shock Your Pool
Get out your safety goggles and gloves—it’s time to shock your pool! When you do, you’re eliminating everything that’s left – algae spores, bacteria, and other contaminants. You can even double shock your pool for even better results. Remember, you want beautiful, clean water!
Dealing with a cloudy pool? Check out this post on treating cloudy water.
11. Retest and Go!
Retest your water to make sure the chlorine level is between 3 – 5 ppm (1 – 3 ppm if using mineral sanitizer). If it is, congratulations, you’re ready to go! Enjoy the summer spending time with friends and family, relaxing by your beautiful in-ground pool.
Remember, if you’re looking for easy and hassle-free, Zagers’ professionally trained staff can open your pool for you. Our pool opening services schedule fills quickly so check availability and schedule an appointment soon.